

Upload records guide
HOW IT WORKS
Manual file upload
Export the original activity file, select it on RQ, and let RQ analyze the record.
Export your file first
Choose the service that holds your run. Already have the file? Continue to the upload steps below.
Export from Garmin Connect
In the Garmin Connect website, open the run, open its settings menu, and choose Export Original. Unzip the download to get the FIT file; do not upload the ZIP archive.
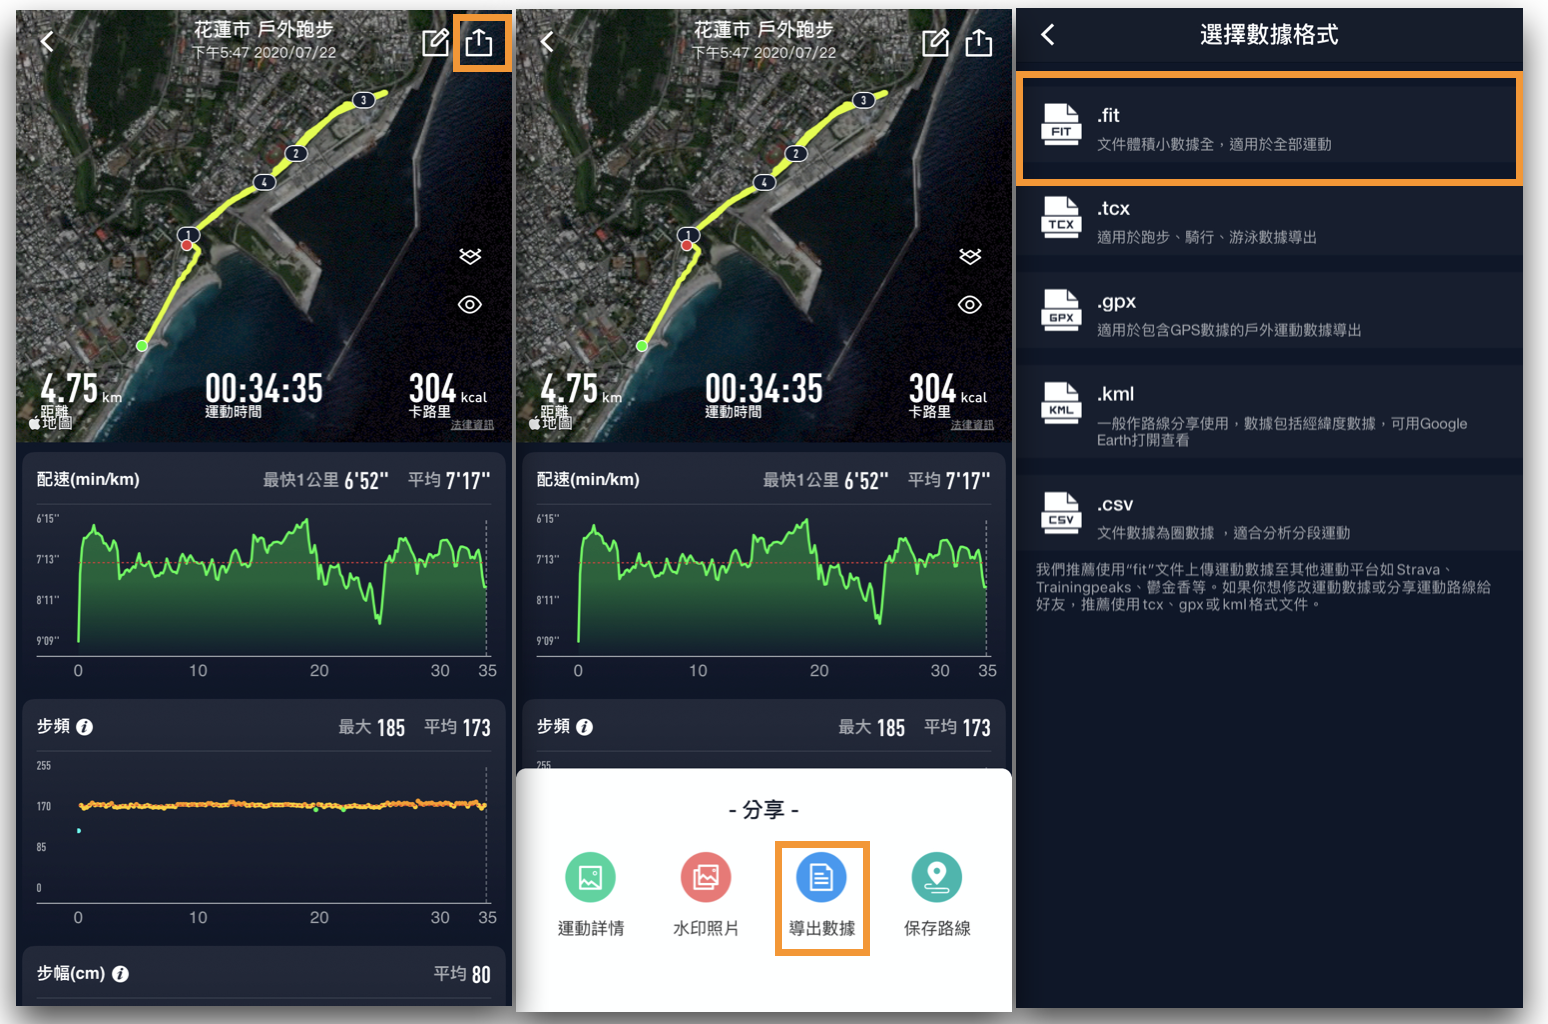
Export from the COROS app
In COROS, open the run and tap the share icon at the top right. Choose Export data, select FIT, and save the file. Keep this original file for the RQ upload.
Export from another service
Export the original activity file, preferably FIT when available. RQ also accepts TCX, GPX, and RQ files. Screenshots and summary pages are not activity files.
FOLLOW THESE STEPS
Complete the upload path
-
01
Open the RQ upload page and select the file.
On the RQ upload page, choose the exported FIT, TCX, GPX, or RQ file under manual upload. On a phone, select the file you saved or downloaded.
-
02
Tap Manually Upload and view the result.
After choosing one file, tap Manually Upload. Once processing finishes, RQ opens the activity and its analysis. If an error appears, keep the original file and check the upload FAQ.
-
03
Check duplicate results if needed.
If the same activity is already in RQ, the duplicate upload is skipped and the existing record remains available.
Continue in RQ
The current upload page will show the available action for your account.