

Upload records guide
HOW IT WORKS
Strava
Connect Strava to RQ, or use Strava as the bridge for a supported device.
Choose how to connect
Use either the RQ app or the website; you do not need to connect twice.
Using the RQ app
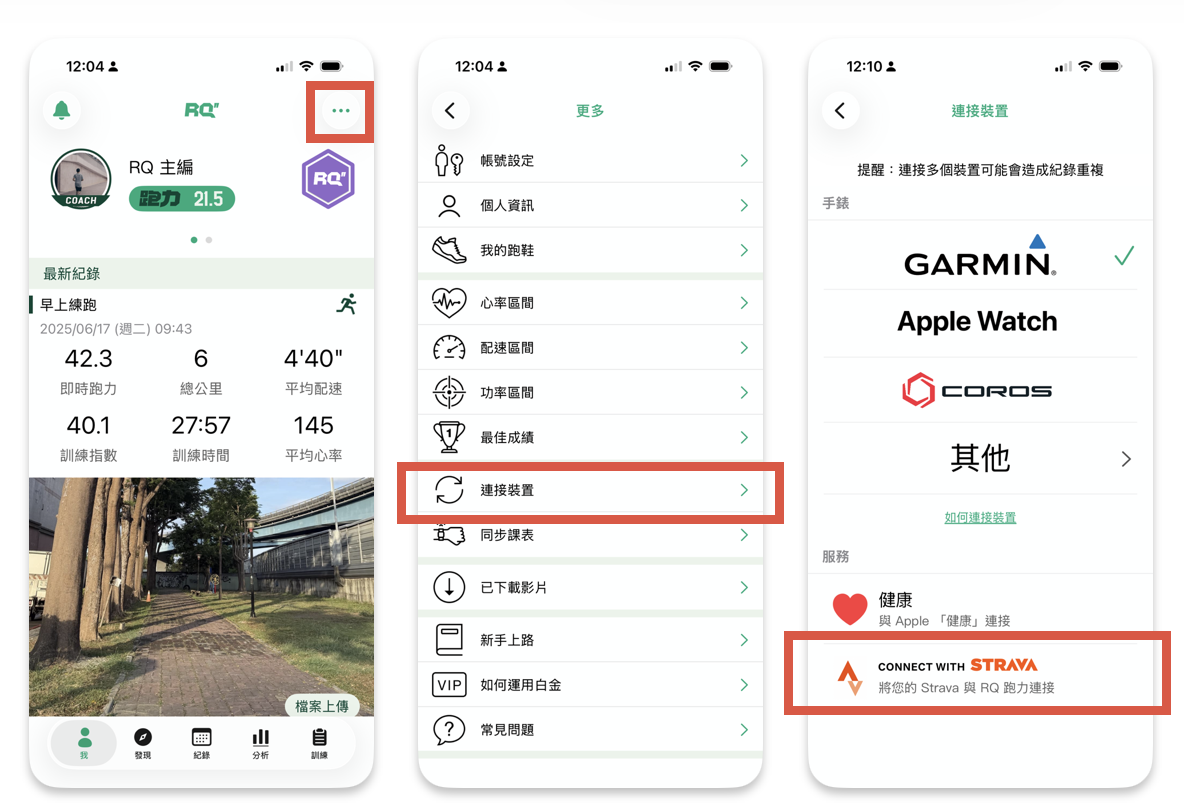
In RQ, tap the top-right More button (...) > Connect devices. Scroll to Services, choose Connect with Strava, then tap Connect now.
Using the RQ website
Open Upload records on the RQ website. Under Strava, select Start AutoSync.
FOLLOW THESE STEPS
Complete the upload path
-
01
First confirm the run appears in Strava.
If your watch uses Strava as a bridge, connect it to Strava first and finish uploading the run there. A run that is not in Strava cannot reach RQ through this path.
-
02
Allow access to private activities.
Sign in to the Strava account that holds your runs. On the RQ authorization screen, select View data about your private activities, then tap Authorize.
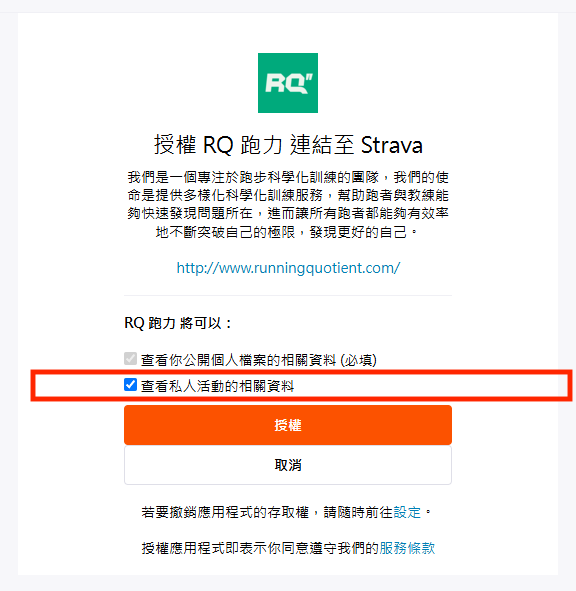
Screenshots from the RQ manual (Traditional Chinese). Tap to enlarge; labels may vary by app version. -
03
Return to RQ and check the record.
Confirm Strava is connected in RQ. The website shows Enabled and Sync Now. If a run is missing, first check Strava and the private activity permission, then use Sync Now and check the RQ calendar.
Continue in RQ
The current upload page will show the available action for your account.